Inpatients
Organise open admissions by ward, find the patient record and work through admission, ward tasks and discharge.
Explore the workflow →A practical walkthrough
Set up forms for the information your department needs. Reuse patient context, work through admission and discharge flows, and print the documents for the file. Then keep the whole team working from the same patient record.
Explore every chapter without signing in.
Start the walkthroughWatch the interface
Chapter 01 Department setup → Forms and templates
An admission in paediatrics needs different information from an admission in surgery. Build customisable forms with structured fields for the information your team needs, and publish them for use in your department’s clinical workflows.
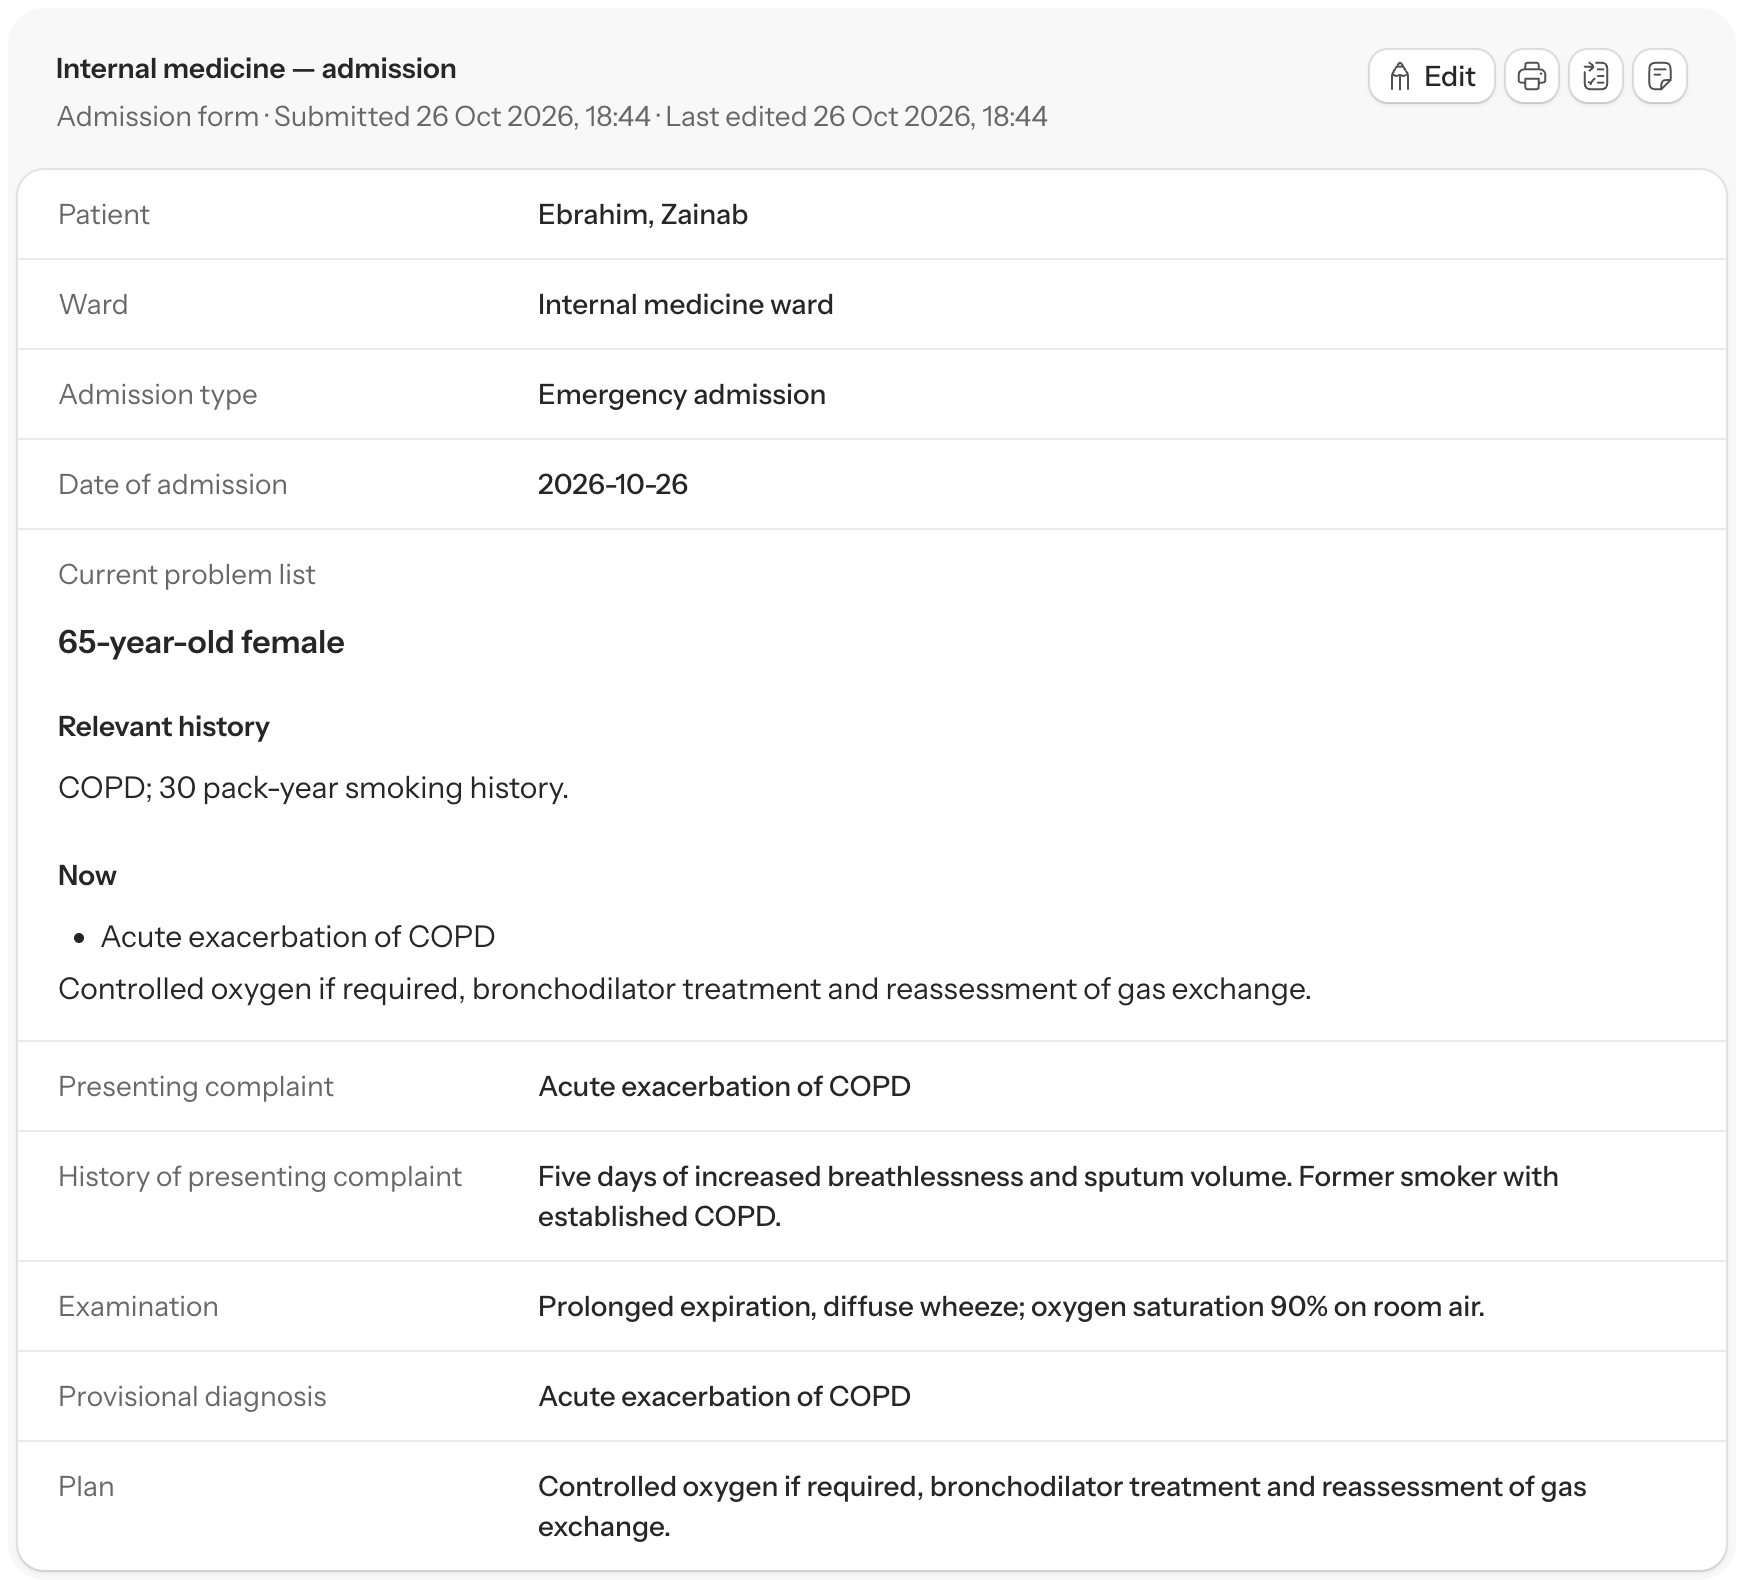
Choose the fields, sections and required information for this encounter. Use structured choices, dates and numbers where appropriate, alongside narrative clinical notes.
Configure supported patient-data bindings so existing information can pre-fill the form. Link the form to the document templates your department needs.
Make the configured form available in the appropriate clinical flow. Clinicians open it from the patient’s encounter rather than looking for a blank paper copy.
Before you use it. Form and flow setup requires the appropriate configuration permissions.
Chapter 02 Patient record → Clinical form
A file number, demographic details and current problem list should not have to be copied from scratch for every document. Apex uses the patient context stored in the database to pre-fill supported fields in configured forms.
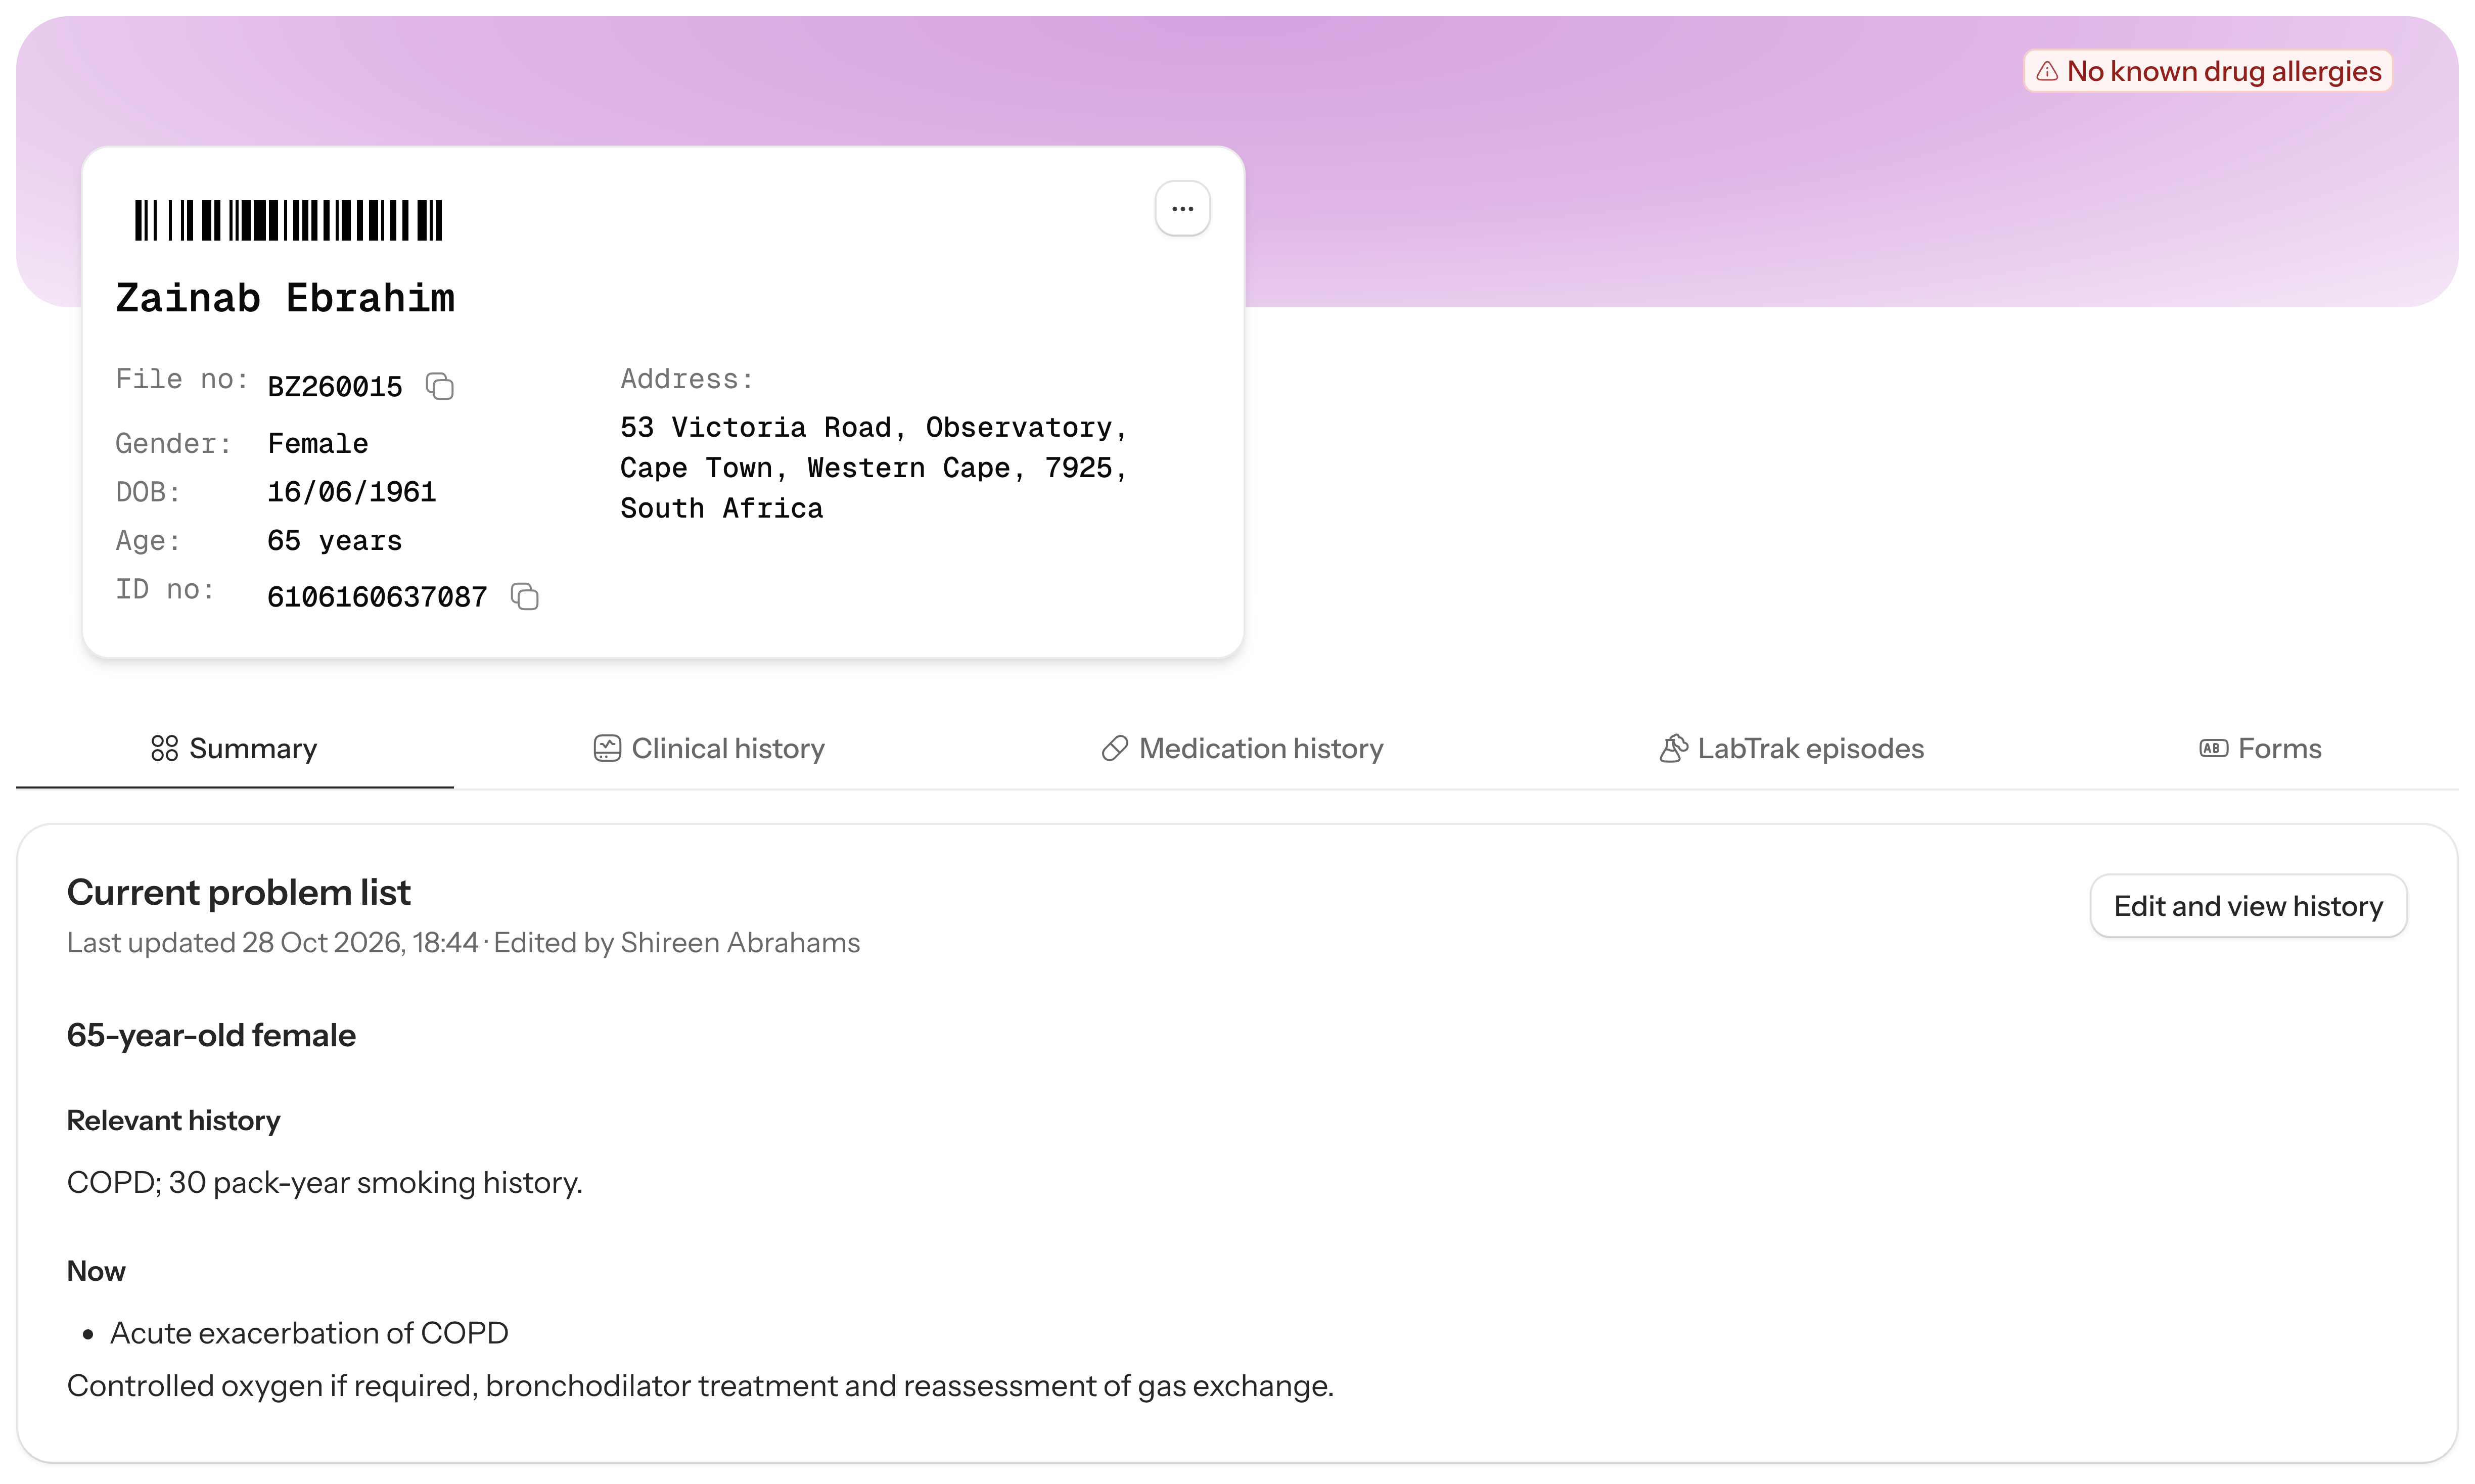
Check the patient’s identifiers and select the relevant encounter before starting a form.
Check the information drawn from the patient record. Correct outdated information through the appropriate patient or form workflow; pre-filled does not mean clinically verified.
Record today’s history, examination and plan. Save the structured form and use the configured output instead of transcribing the same information into another blank document.
Before you use it. Pre-filling depends on the fields and bindings configured in that form. Unlinked fields still need to be completed.
Chapter 03 Patient chart → Encounter → Clinical flow
Stop hunting for the next form. Customisable clinical flows put your department’s admission or discharge forms, prescription steps and document output in an agreed sequence. Patient context can pre-fill configured fields, leaving the team to check existing information and capture what has changed.
Open the relevant encounter on the patient chart and start its available admission or discharge flow.
Review pre-filled information, complete the clinical fields and work through the steps your department has configured. Include prescription steps where the flow calls for them.
Prepare the print bundle from the configured document templates. Review it, then print the documents for the physical patient file. The team keeps a structured record in Apex while the folder gets its paper copy.
Before you use it. Available steps and printable documents depend on your department’s published forms and document templates. A flow can also finish without printing.
Chapter 04 Patient chart → Tasks
Keep the patient’s current problems and outstanding jobs available to the next person on the team. Shared patient records and assigned tasks reduce the need to reconstruct the plan from separate lists at every handover.
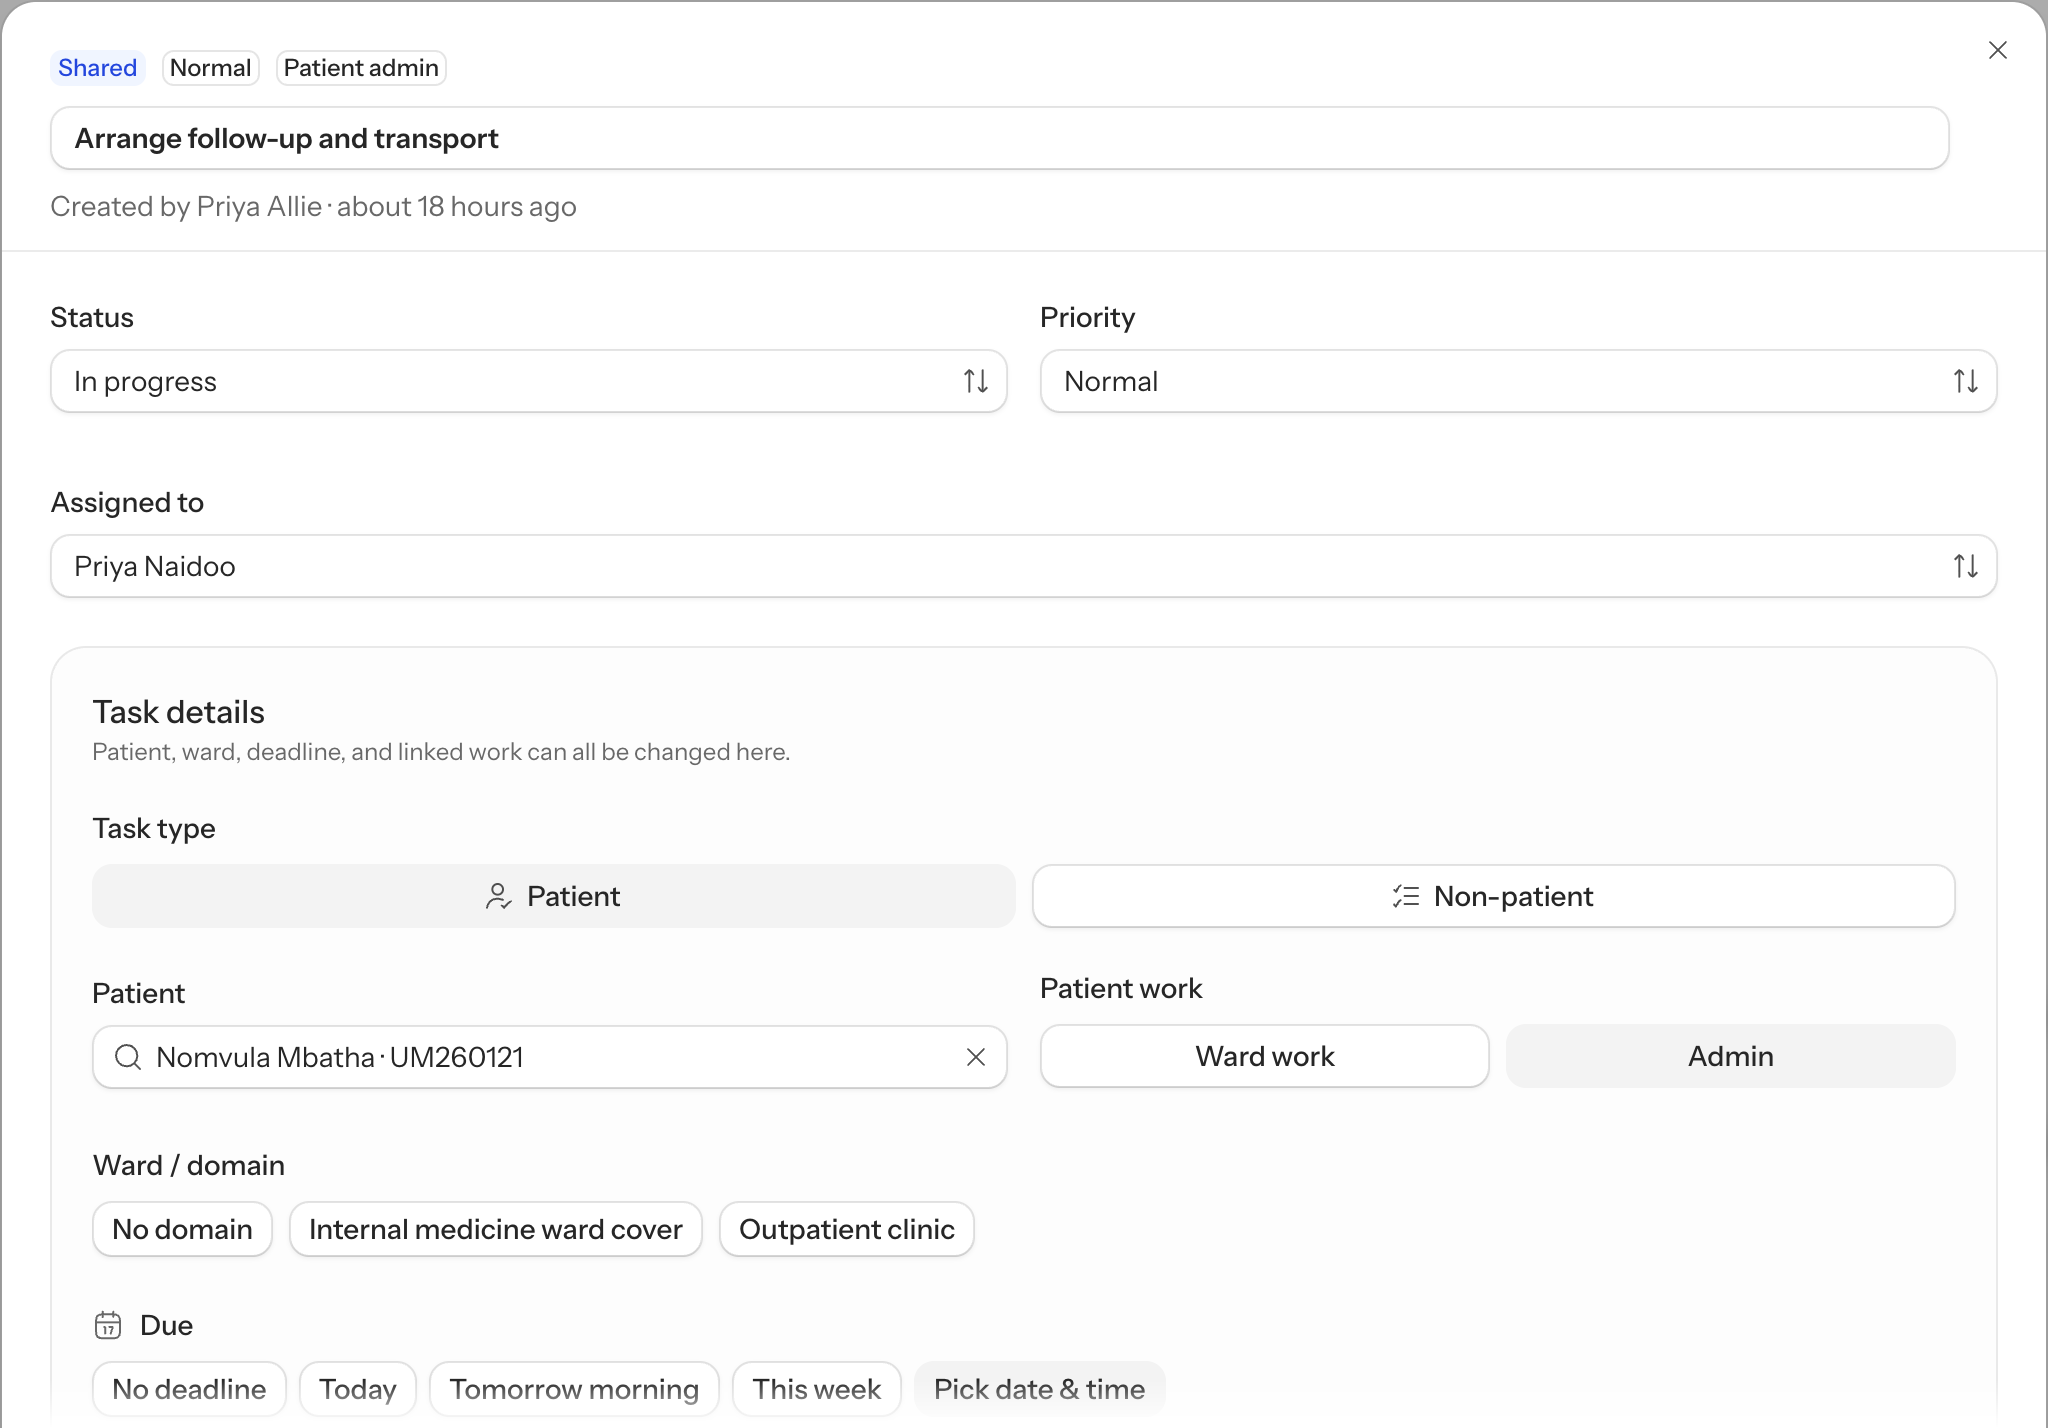
Check the active admission and clinical events before adding new work.
Choose New task in the patient’s Tasks section. Describe the job, then set the appropriate priority, assignee and due date.
Patient-linked work also appears in the relevant personal or department worklist. Open the task to update its status as the work progresses.
Before you use it. Task visibility follows department access and task scope. A recorded task still needs someone to carry out the clinical work.
Chapter 05 Department → Inpatients
Before the first review, see who is admitted and where they are. The inpatient board groups open admissions by ward and puts admission dates beside the patient.
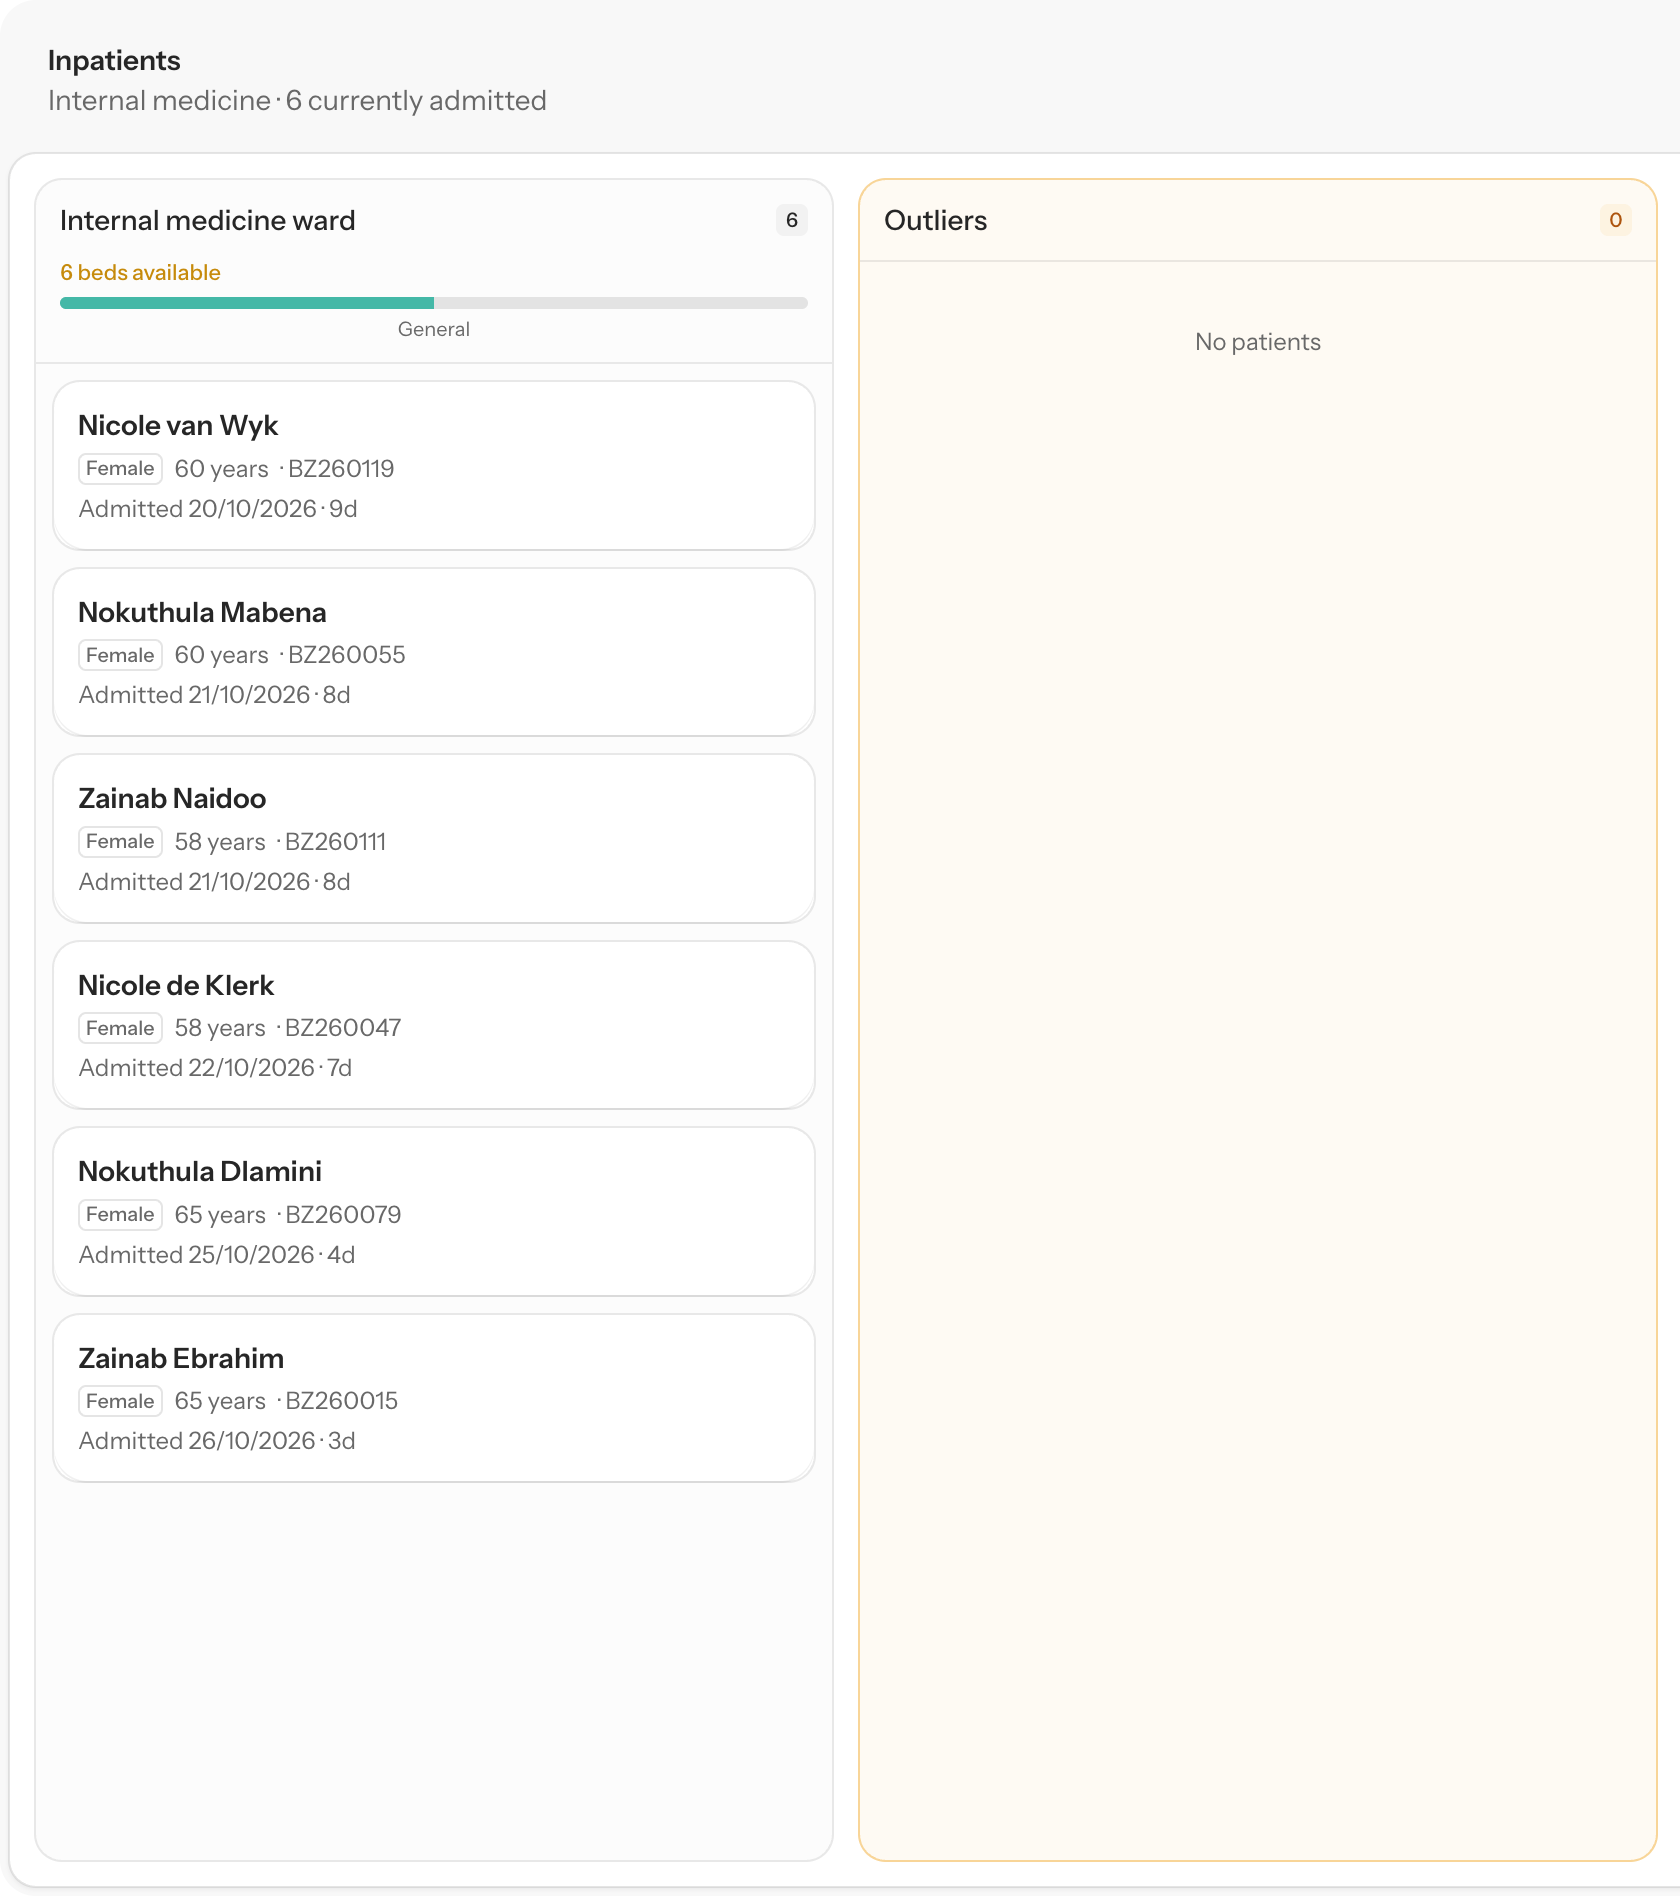
Open Inpatients from the department navigation. The board uses your active department.
Look through the ward columns and check the file number before opening a chart. Ward capacity appears where it has been configured.
Select a patient to see their active admission, clinical events, observations and outstanding tasks.
Before you use it. Ward names and capacity depend on your facility’s setup. The board shows admissions recorded in Apex.
Chapter 06 Department → Outpatients
Give follow-up a date and a place on the department’s outpatient list. See clinic capacity and keep changes attached to the booking.
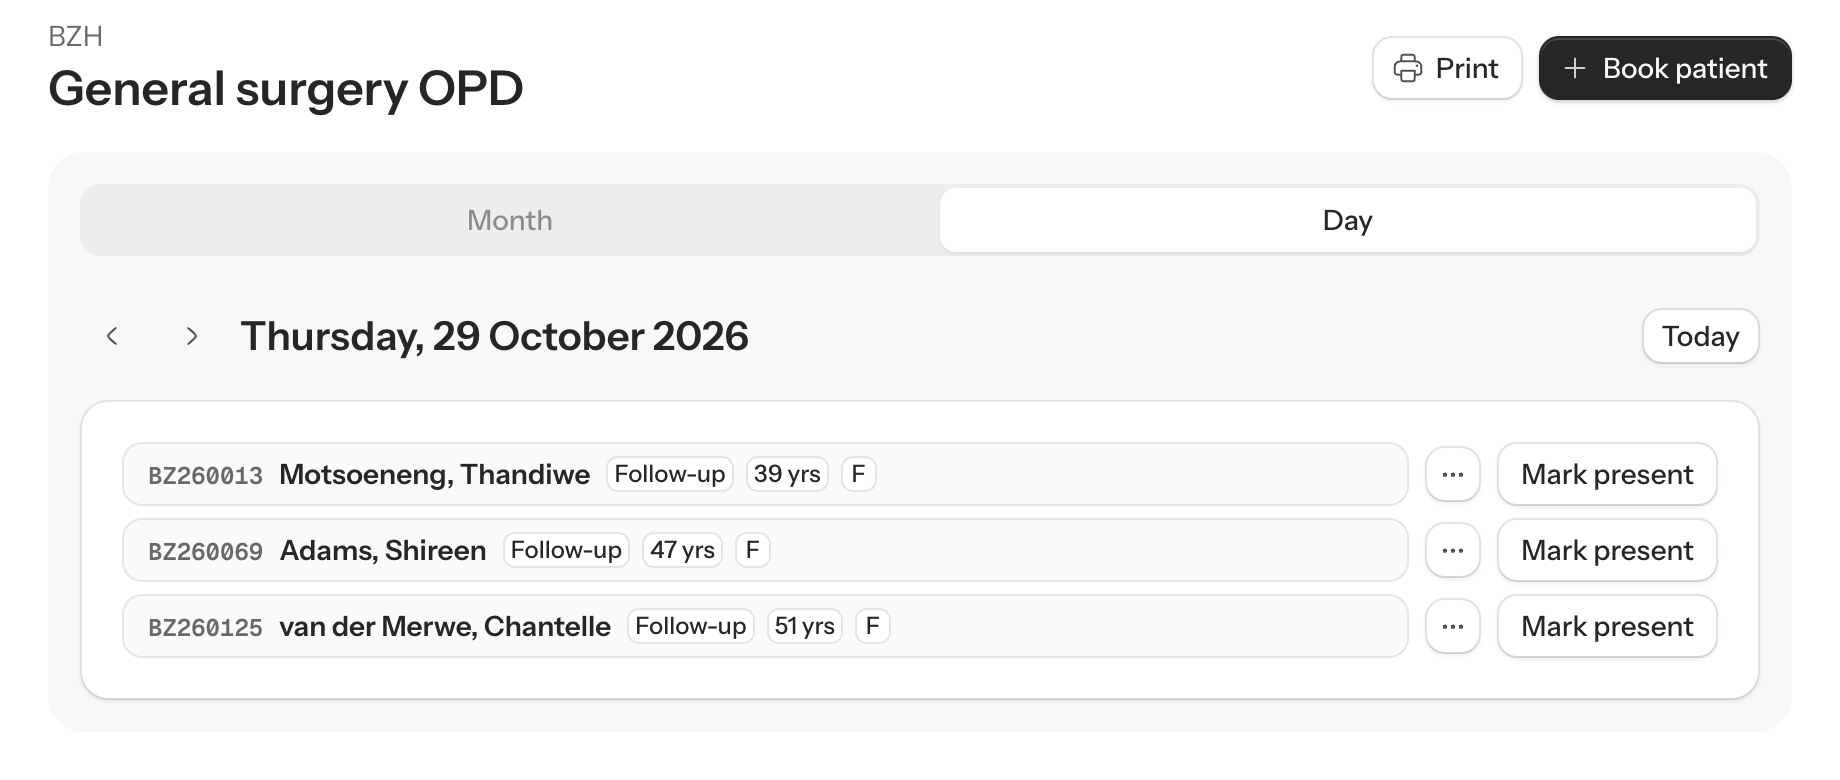
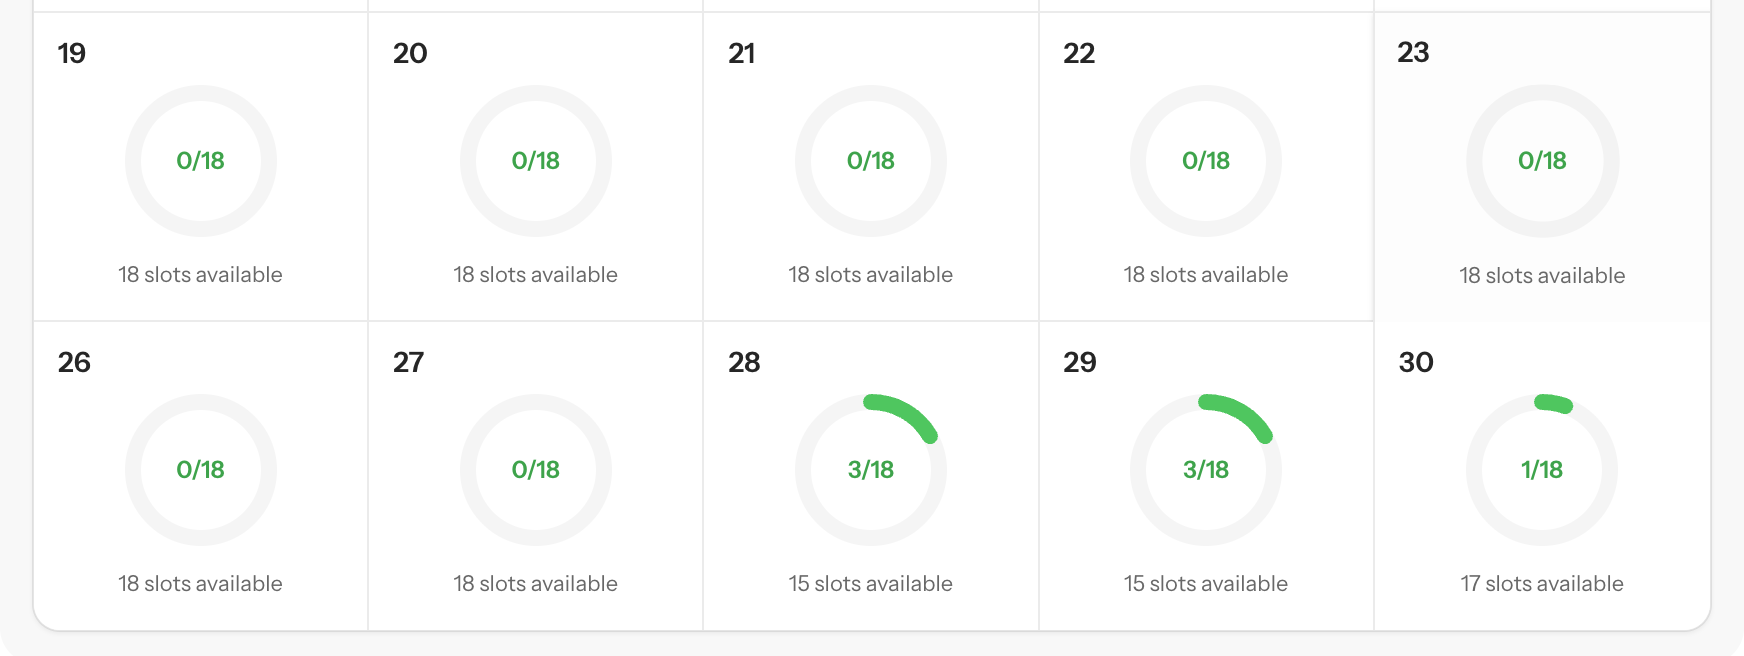
Choose Outpatients in the active department. Review the selected day and its bookings.
Use the available booking workflow to select the patient, appointment and date. Review capacity information before confirming.
On the appointment day, mark the patient present. Use the booking actions to reschedule or cancel when plans change.
Before you use it. OPD must be enabled for the department. Appointment types, booking forms and scheduling rules are configured locally.
Chapter 07 Prescriptions → New prescription
When the pharmacy has published a stock report, its items appear in medicine search. See the reported quantity and report date while writing the prescription.
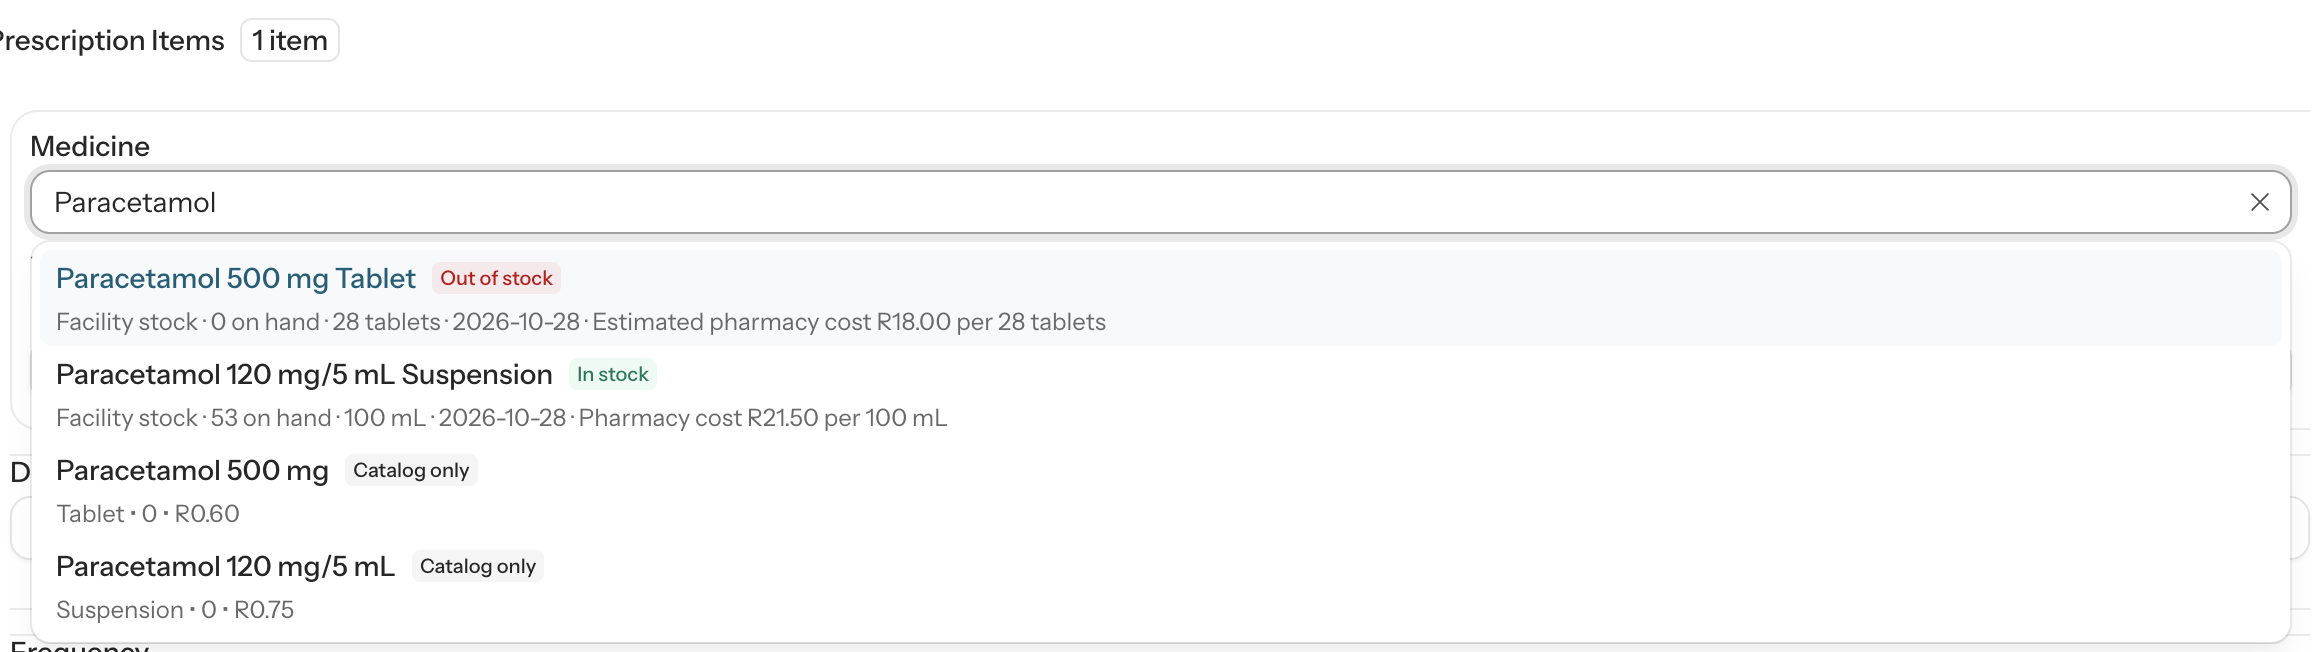
Create a prescription and search the medicine catalogue. Facility stock items appear when a report has been published.
For a stock result, check the formulation, reported quantity and report date. Pay attention to out-of-stock and stale-report warnings.
Verify medicine details and enter the dose, route, duration and quantity. Save the prescription and review its preview before printing.
Before you use it. Stock is a dated report, not live dispensing availability. Saving a prescription does not reserve or reduce stock. Clinical prescribing decisions remain with the prescriber.
One patient record, different clinical settings
Departments enable and configure the workspaces that fit their service. Forms and clinical flows adapt the information you capture within that setup.
Organise open admissions by ward, find the patient record and work through admission, ward tasks and discharge.
Explore the workflow →Book follow-up against clinic schedules and capacity, view the day’s patients and manage attendance or rescheduling.
Explore the workflow →Use the theatre workspace to organise cases and operating lists. Theatre setup and access determine the lists and actions available to your team.
Configure inpatient wards, bed sections and department-specific forms for your service. Use that setup to organise the patient list and capture the clinical information your team needs.
Define the information to capture and the sequence of work. Reuse patient context and generate configured documents for printing.
Explore the workflow →Keep patient-linked jobs assigned, prepare prescriptions with dated stock context, and access LabTrak where the external service is configured.
Explore the workflow →Before your first shift
Yes. Open Apex in a browser on your phone or computer and sign in securely with your own account. Patient records and department workspaces follow your authorised access. An internet connection is required; sign out when you finish on a shared computer.
Yes. Published document templates turn captured information into printable clinical documents. Review and print the output for the patient file while retaining the structured record in Apex. Available documents depend on your department’s setup.
Users with the appropriate configuration permissions set up and publish the forms, templates and flows for the department. Clinicians then use those published workflows during care.
Only supported fields connected to patient context are pre-filled. Your department configures those links. Review the information for accuracy and complete the fields that are specific to this encounter.
No. Enabled modules, wards, beds, appointment rules, forms and flows depend on facility and department setup and your permissions. ICU workflows use configured inpatient wards and clinical forms.
The LabTrak workspace supports patient and specimen searches and episode results, with external-service credentials required. Prescribing can show the latest published facility stock report, including its date. A stock report does not establish live dispensing availability.
No. All public demonstration screens and recordings use fictional patient information. The guide is accessible without signing in; clinical work requires an authorised account.
Sign in to open your department and the tools available to your team.
Sign in to ApexBack to the beginning ↑